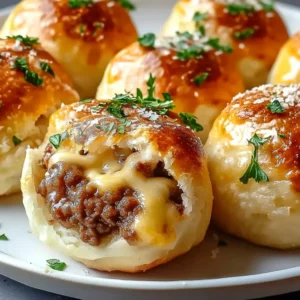
If you’re looking for a fun, flavorful, and totally irresistible twist on the classic burger, these Ultimate Garlic Parmesan Cheeseburger Bombs are exactly what you need. Juicy ground beef wrapped around gooey mozzarella, coated in a golden garlic-Parmesan crust, and baked to perfection—these handheld bites deliver all the comfort of a cheeseburger with a gourmet upgrade. Perfect for weeknight dinners, game day spreads, or party appetizers, they’re easy to make and guaranteed to disappear fast.
Why You’ll Love This Garlic Parmesan Cheeseburger Bombs
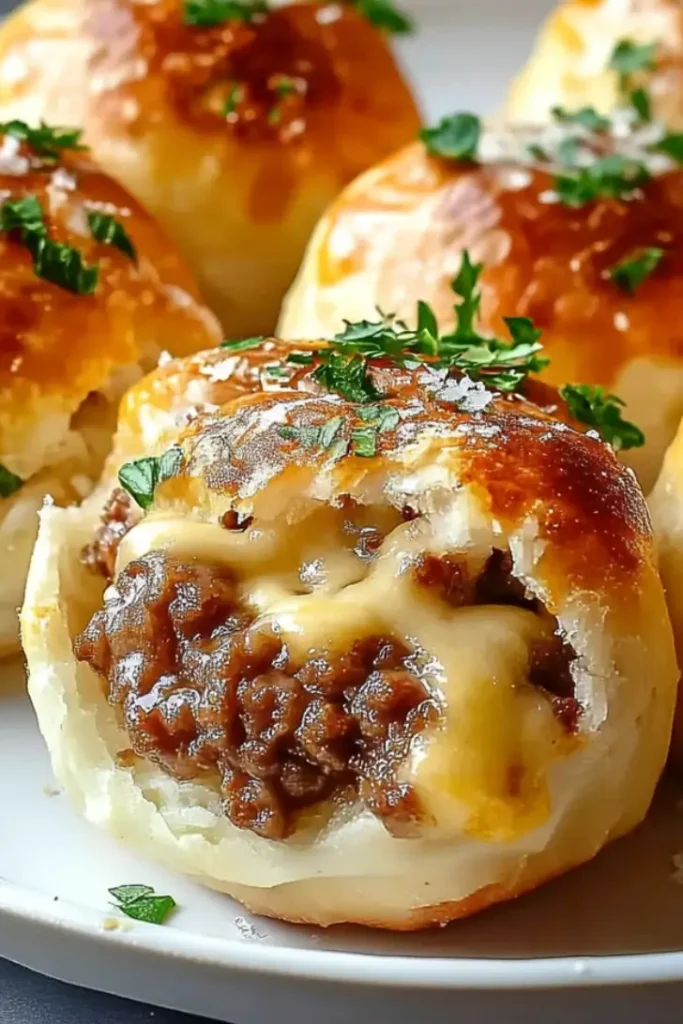
These aren’t just meatballs—they’re flavor-packed mini-miracles. The combination of savory beef, melted cheese, and a crispy, herby crust creates a satisfying texture contrast in every bite. They’re simple enough for beginner cooks but impressive enough to serve guests. Plus, they’re baked (not fried), making them a lighter yet still indulgent option. Kids adore them, adults can’t get enough, and cleanup is a breeze. Best of all? You only need one mixing bowl and a baking sheet!
Ingredients for Garlic Parmesan Cheeseburger Bombs
Everything you need is pantry- or fridge-friendly, with no obscure ingredients. Here’s what to gather:
For the Beef Filling:
- 1 lb (454g) ground beef (80/20 blend recommended for juiciness)
- 1 tablespoon Worcestershire sauce
- 1 teaspoon garlic powder
- ½ teaspoon salt
- ¼ teaspoon black pepper
For the Cheese Center:
- 6–8 mozzarella string cheese sticks (standard 6-inch size)
For the Garlic Parmesan Coating:
- 1 cup panko breadcrumbs
- ½ cup freshly grated Parmesan cheese
- 3 tablespoons unsalted butter, melted
- 1 teaspoon garlic powder
- Optional: 1 tablespoon chopped fresh parsley (for color and freshness)
Ingredient Notes: Substitutions & Swaps
- Mozzarella sticks: If you can’t find pre-portioned sticks, cut a block of low-moisture mozzarella into 6–8 equal rectangles (about ½-inch thick). Pat dry with paper towels to reduce excess moisture.
- Dairy-free? Swap mozzarella for dairy-free cheese sticks and use nutritional yeast or vegan Parmesan. Replace butter with plant-based butter or olive oil.
- Gluten-free? Use certified gluten-free panko (or crushed gluten-free crackers) to keep the crispy texture intact.
- Leaner beef? You can use 90/10 ground beef, but the bombs may be slightly less juicy. Avoid extra-lean (95%) as it can dry out during baking.
- No Worcestershire? Substitute with 1 teaspoon soy sauce + a pinch of sugar, or 1 teaspoon tamari for a gluten-free option.
Step-by-Step Instructions
Follow these simple steps for perfectly golden, melty Cheeseburger Bombs every time.
Step 1 – Prep the Cheese & Preheat
Preheat your oven to 400°F (200°C). Line a baking sheet with parchment paper or a silicone mat for easy cleanup. Unwrap your mozzarella sticks and set them aside. If your kitchen is very warm, place them in the freezer for 5–10 minutes—this helps prevent early melting during baking.
Step 2 – Make the Beef Mixture
In a medium bowl, combine the ground beef, Worcestershire sauce, 1 teaspoon garlic powder, salt, and pepper. Use your hands (clean!) or a fork to mix gently—just until combined. Avoid overmixing, which can make the beef tough.
Step 3 – Form the Bombs
Divide the beef mixture into 6–8 equal portions (about 2–3 tablespoons each). Flatten each into a thin oval (roughly 4×3 inches). Place one mozzarella stick in the center and carefully wrap the beef around it, sealing all seams completely. Any gaps will cause cheese to leak during baking.
Step 4 – Prepare the Coating
In a shallow bowl or pie plate, mix panko, grated Parmesan, melted butter, and 1 teaspoon garlic powder until evenly combined. The mixture should be crumbly but hold together slightly when pressed.
Step 5 – Coat and Bake
Roll each beef-wrapped cheese stick gently in the garlic-Parmesan mixture, pressing lightly to help it adhere. Place seam-side down on the prepared baking sheet, spaced about 1 inch apart. For extra crispness, you can brush the tops lightly with remaining melted butter.
Bake for 20–25 minutes, or until the coating is deep golden brown and the internal temperature of the beef reaches 160°F (71°C). Avoid opening the oven too early—this can cause cheese to burst out.
Step 6 – Rest and Serve
Let the bombs rest for 3–5 minutes after baking. This allows the cheese to slightly set, reducing the chance of a molten mess (though a little ooze is part of the charm!). Sprinkle with fresh parsley if using, and serve warm.
Pro Tips for Success
- Seal tightly: Any tiny hole in the beef = cheese lava. Pinch seams well and smooth with wet fingers if needed.
- Chill before baking (optional): For extra insurance against bursting, refrigerate formed bombs for 15 minutes before coating and baking.
- Use fresh Parmesan: Pre-grated Parmesan often contains anti-caking agents that dull flavor and texture. Grate it yourself for best results.
- Don’t skip the Worcestershire: It adds depth and umami that mimics grilled burger flavor—key for authenticity.
- Bake on a rack: For all-around crispiness, place a wire rack on your baking sheet and cook the bombs on it. This prevents soggy bottoms.
- Double the batch: These freeze beautifully! Bake extras and store for quick future meals.
Flavor Variations
Make these bombs your own with these easy twists:
- Spicy Kick: Add ½ teaspoon smoked paprika + ¼ teaspoon cayenne to the beef mix. Top with pickled jalapeños before serving.
- Mushroom-Swiss Style: Replace mozzarella with Swiss cheese and add 2 tablespoons finely minced sautéed mushrooms to the beef.
- BBQ Bacon Bombs: Mix 2 tablespoons BBQ sauce into the beef. Wrap each cheese stick with half a slice of cooked bacon before adding beef.
- Mediterranean Twist: Use feta instead of mozzarella. Add 1 teaspoon dried oregano + 1 tablespoon chopped kalamata olives to the beef.
- Breakfast Bombs: Swap beef for sausage-seasoned ground pork (or turkey), use cheddar sticks, and add a dash of maple syrup to the coating.
Serving Suggestions
These bombs shine as a main dish or appetizer. Try them with:
- Dipping Sauces: Classic ketchup, garlic aioli, marinara, or ranch.
- Side Salads: A crisp arugula salad with lemon vinaigrette cuts the richness perfectly.
- Buns (optional): Slice in half and tuck into mini brioche buns for “burger bomb sliders.”
- Veggies: Roasted sweet potato fries, zucchini sticks, or cucumber rounds balance the meal.
- Party Platter: Serve alongside onion rings, pickles, and cherry tomatoes for a DIY burger bar.
Storage and Freezing Instructions
- Refrigerator: Store cooled bombs in an airtight container for up to 3 days.
- Reheating: Warm in a 350°F (175°C) oven for 10–12 minutes until hot and crispy again. Avoid microwaving—it makes the coating soggy.
- Freezing (Unbaked): Assemble bombs through the coating step, then freeze on a tray until solid. Transfer to a freezer bag for up to 2 months. Bake from frozen—add 5–8 minutes to cook time.
- Freezing (Baked): Freeze cooled bombs on a tray, then bag. Reheat from frozen in oven at 375°F (190°C) for 15–20 minutes.
Nutrition Facts (Per Serving – Makes 6 Bombs)
| Nutrient | Amount |
|---|---|
| Calories | 380 |
| Protein | 22g |
| Carbohydrates | 12g |
| Fat | 26g |
| Fiber | 1g |
| Sodium | 620mg |
Note: Values are estimates and may vary based on ingredient brands and cheese size.
FAQ About Garlic Parmesan Cheeseburger Bombs
Can I make these ahead of time?
Absolutely! Assemble the bombs (through the coating step) up to 24 hours ahead. Cover and refrigerate on the baking sheet. Let sit at room temperature for 10 minutes before baking. You can also freeze them unbaked (see storage tips above).
Why did my cheese leak out?
This usually happens if the beef isn’t sealed tightly, the cheese was too warm, or the oven temperature was too high. Make sure seams are fully closed, use cold cheese, and bake at the correct temperature. Resting after baking also helps contain the melt.
Can I air fry these?
Yes! Cook at 375°F (190°C) for 10–12 minutes, flipping halfway. The coating gets extra crispy, but watch closely—cooking time varies by air fryer model.
What if I don’t have panko?
Regular breadcrumbs work, but the crust will be less crunchy. For a closer texture, pulse regular breadcrumbs in a food processor with 1 tablespoon of crushed cornflakes or crushed crackers.
Are these kid-friendly?
Very! Kids love the cheesy surprise inside. For picky eaters, reduce the garlic powder slightly or omit parsley. Serve with familiar dips like ketchup or mild ranch.
Garlic Parmesan Cheeseburger Bombs
Equipment
- mixing bowl
- baking sheet
- parchment paper or silicone mat
- measuring spoons
- food-safe gloves (optional)
Ingredients
- 1 lb ground beef (80/20)
- 1 tbsp Worcestershire sauce
- 1 tsp garlic powder
- 0.5 tsp salt
- 0.25 tsp black pepper
- 6-8 sticks mozzarella string cheese
- 1 cup panko breadcrumbs
- 0.5 cup freshly grated Parmesan cheese
- 3 tbsp unsalted butter, melted
- 1 tsp garlic powder
- 1 tbsp chopped fresh parsley (optional)
Instructions
- Preheat your oven to 400°F (200°C). Line a baking sheet with parchment or a silicone mat. Freeze the cheese sticks for 5–10 minutes if needed.
- Mix ground beef, Worcestershire sauce, garlic powder, salt, and pepper until just combined.
- Divide beef into 6–8 portions. Flatten each, place a cheese stick in the center, and wrap tightly, sealing all seams.
- In a bowl, combine panko, Parmesan, melted butter, garlic powder, and parsley if using.
- Roll each beef-wrapped cheese log in the coating. Bake for 20–25 minutes until deep golden and beef reaches 160°F (71°C).
- Let cool for 3–5 minutes before serving. Garnish with extra parsley if desired.
Notes
Nutrition
Final Thoughts
These Ultimate Garlic Parmesan Cheeseburger Bombs bring together comfort food and crowd-pleasing flair in one easy recipe. With minimal ingredients, simple prep, and maximum flavor, they’re destined to become a go-to for busy nights and special occasions alike. Whether you’re feeding a family or hosting friends, one bite of these golden, cheesy, garlicky bundles will have everyone asking for seconds—and your recipe!