
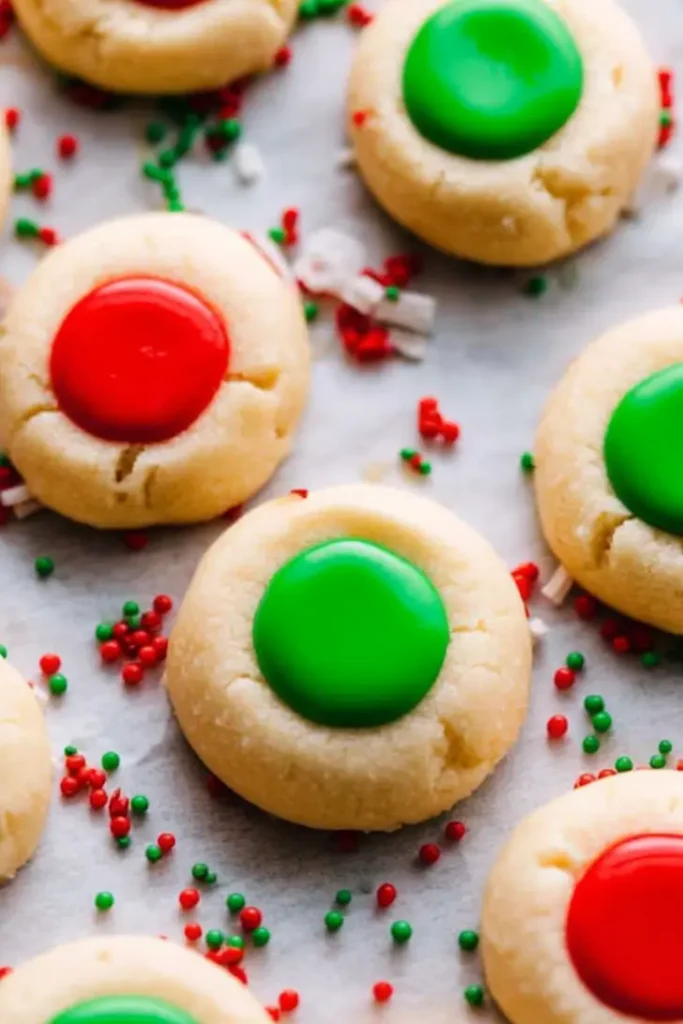
Iced thumbprint cookies are melt-in-your-mouth shortbread treats topped with a smooth, colorful vanilla icing. These pretty, buttery cookies add charm to any gathering — from festive holidays to cozy weekend bakes with family. Each cookie features a soft center filled with glossy icing that’s as sweet as it looks.
Why You’ll Love This Recipe
These cookies offer bakery-quality results with minimal effort. The tender, buttery base pairs beautifully with the creamy vanilla icing, creating a perfect balance of texture and sweetness. Made with just a handful of pantry staples, the dough comes together quickly and is easy to shape after chilling.
The best part? The icing turns simple cookies into eye-catching creations you can customize for any event. Choose seasonal colors — red and green for Christmas, pastels for spring, or white for a timeless look. Kids love helping make the thumbprints and decorating, so it’s a fun family baking project too.
This recipe makes about three dozen cookies that stay fresh for days, making them great for parties, gifts, or make-ahead holiday baking.
Easy Iced Thumbprint Cookies
Equipment
- mixing bowl
- electric mixer
- spatula
- baking sheets
- parchment paper
- measuring spoons
- wire cooling rack
- small bowls (for icing)
- piping bags or zip-top bags
Ingredients
- 1 cup unsalted butter, softened
- 1/3 cup granulated sugar
- 1 teaspoon vanilla extract
- 2 cups all-purpose flour
- 1 pinch salt
- 1 cup powdered sugar
- 1.5 tablespoons milk
- 0.5 teaspoon vanilla extract (for icing)
- food coloring (optional)
Instructions
- In a mixing bowl, beat the softened butter, granulated sugar, and vanilla extract together until light and fluffy, about 2–3 minutes.
- Add the flour and salt to the butter mixture and mix on low speed until just combined into a soft dough.
- Cover the dough and refrigerate for at least 1 hour until firm.
- Preheat oven to 350°F (175°C) and line baking sheets with parchment paper.
- Roll dough into 1½-inch balls and place them 1 inch apart on prepared sheets.
- Press your thumb or the back of a teaspoon into the center of each ball to create an indentation.
- Bake for 10 minutes, remove from oven, and re-press indentations while cookies are still hot.
- Return to the oven for another 6–8 minutes until lightly golden around the edges.
- Cool cookies on a wire rack completely before icing.
- In a small bowl, whisk powdered sugar, milk, and vanilla until smooth. Adjust consistency as needed.
- Divide icing into bowls, tint with food coloring if desired, and fill cookie indentations with icing.
- Let cookies sit at room temperature until the icing sets, about overnight or 2 hours in the fridge.
Notes
Nutrition
Ingredients
Cookie Dough
- 1 cup unsalted butter, softened
- 1/3 cup granulated sugar
- 1 tsp vanilla extract
- 2 cups all-purpose flour
- Pinch of salt
Vanilla Icing
- 1 cup powdered sugar
- 1½ tbsp milk
- ½ tsp vanilla extract
- Food coloring (optional)
Ingredient Tips:
- Butter: Use unsalted butter at room temp. Skip the added salt if using salted butter.
- Flour: All-purpose flour works best; for gluten-free, use a 1:1 blend.
- Milk: Any dairy or plant-based milk works — add gradually for perfect icing consistency.
- Coloring: Gel food coloring creates vibrant hues without thinning the icing.
Step-by-Step Directions
- Cream Butter & Sugar – Beat butter, sugar, and vanilla until light and fluffy (2–3 minutes).
- Add Dry Ingredients – Mix in flour and salt just until combined. Don’t overmix.
- Chill Dough – Cover and refrigerate for at least 1 hour to firm up.
- Preheat Oven – Set to 350°F and line baking sheets with parchment paper.
- Shape Dough – Roll chilled dough into 1½-inch balls and arrange 1 inch apart.
- Make Indentations – Press a deep thumbprint or use a measuring spoon to form wells.
- First Bake – Bake 10 minutes until slightly firm but not browned.
- Re-Press & Finish Baking – Re-press the centers, then bake 6–8 minutes more until lightly golden.
- Cool Completely – Transfer cookies to a wire rack before icing.
- Mix Icing – Whisk powdered sugar, milk, and vanilla until smooth. Adjust texture as needed.
- Color & Fill – Tint icing, pipe into wells, and let set overnight or chill to speed up.
Tips for Perfect Cookies
- Chill thoroughly – Keeps cookies from spreading.
- Press deep indentations – For more icing in each bite.
- Re-press while hot – Prevents cracking.
- Test icing consistency – It should be thick but pourable.
Flavor Variations
- Chocolate: Add 2 tbsp cocoa powder to the dough and fill with white icing or ganache.
- Lemon: Use lemon extract and zest for bright, tangy flavor.
- Almond: Swap in almond extract; top with a sliced almond.
- Jam-Filled: Spoon in jam before baking instead of icing afterward.
- Peppermint: Add peppermint extract and crushed candy canes for a festive touch.
Serving Ideas
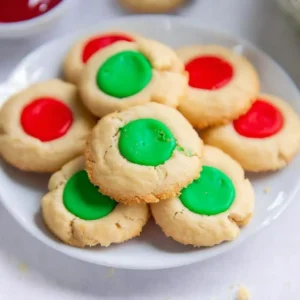
These cookies look beautiful on dessert platters, gift trays, or tea tables. Package in clear bags tied with ribbon, layer in tins, or create a DIY cookie decorating station for kids and guests.
Storage & Freezing
- Room Temp: Store in airtight containers up to 1 week.
- Freeze Dough or Cookies: Freeze unbaked dough balls or plain baked cookies (without icing) for up to 3 months. Thaw, then ice before serving.
- Avoid Refrigerating Iced Cookies: Condensation can make icing sticky.
FAQ Highlights
Why did my cookies spread?
The dough may have been too warm. Chill it longer before baking.
Can I make these ahead?
Yes! Bake plain cookies and ice them later.
Can I skip food coloring?
Absolutely — the cookies look elegant with white icing.
Why re-press the centers?
The wells puff during baking; pressing again ensures room for icing.
Final Thoughts
These easy iced thumbprint cookies are a delightful mix of buttery shortbread and sweet, glossy icing — perfect for holidays, gifts, or a simple weekend bake. With endless flavor and color variations, they’re a timeless cookie you’ll want to make year-round.